Arduino Giga R1 WiFi
This article describes how a J-Link probe can be used together with an Arduino Giga R1 WIFI board.
Contents
Minimum requirements
- Any J-Link
- J-Link software V7.86h or later
- Embedded Studio Version 7.12a or later
- A way to connect to the 10 pin debug connector of the Arduino Giga R1 board e.g. a 9 Pin Cortex-M Adapter
Preparing for J-Link
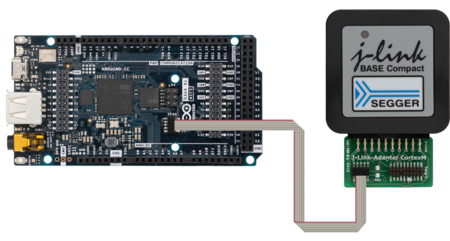
As the Arduino Giga R1 WIFI comes with a presoldered 10-pin debug connector labeled JTAG all you need is a connector/adapter for that interface. If you are using the full size or compact models of J-Link the 9-Pin Cortex-M Adapter can be used. In this example we are using a J-Link Plus Compact. The resulting connection will then look like this:
- Power the board via the USB-C port
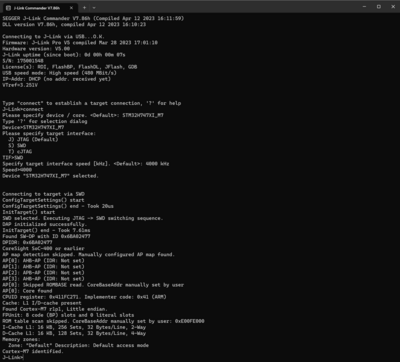
- Verify the Connection with e.g. J-Link Commander. The output should look as follows:
Note: Due to some issues with the Arduino Bootloader it is necessary to connect via the J-Link Commander twice as the first try will fail.
Debugging with Arduino tool chain
Generally there is two ways to debug a Arduino sketch with J-Link. Both variants are explained below.
Direct debugging of the Arduino sketch
How to debug your Arduino sketch directly is explained here: How_to_debug_an_Arduino_Sketch_with_Ozone_and_J-Link
Indirect debugging of the Arduino sketch
Generally we recommend the direct debug approach as shown above. But if for some reason you can't use that method you can still debug as follows.
- Connect your board to a J-Link as explained above and test the connection with J-Link Commander.
- Download your Arduino Sketch with e.g. Arduino IDE via the USB-Interface as usual.
- Now you can launch your favorite debugger with J-Link and attach to the running application and debug your system.
We recommend using Ozone, the J-Link debugger as it offers the best debug experience with SEGGER debug probes. You can set Ozone to attach to the target device via Debug->Start Debug Session->Attach to Running Program.
Bare-metal Debugging
Example project for SEGGER Embedded Studio
The following example projects were created with the SEGGER Embedded Studio project wizard. For it to run out-of-the-box on the Arduino Giga R1 board we recommend to first erase the Arduino Bootloader from the board with e.g. J-Link Commander.
Note: When debugging bare metal on the Arduino Board, the Arduino Bootloader will not be available. If you want to revert the Arduino board to its original state you need to flash the Arduino bootloader of the corresponding board you are using. For this the now established connection between your J-Link and the board can be used.
Bootloader sources can be found here: https://github.com/arduino/ArduinoCore-mbed/tree/main/bootloaders/GIGA
As a tool we recommend using J-Link Commander where you can use commands loadfile/loadbin to flash the bootloader file. If the bootloader for your board should not be available you can simply dump it into a binary file also using the J-Link Commander and the command savebin. For more information see our J-Link user manual.

