Using J-Link VCOM functionality
Enabling VCOM
In general, the VCOM feature can be disabled and enabled for debug probes which comes with support for it via J-Link Commander and J-Link Configurator.
Please note, that:
- VCOM can only be used when debugging via SWD target interface. Pin 5 = J-Link-Tx (out), Pin 17 = J-Link-Rx (in).
- Currently, only J-Link models listed on the following page marked with VCOM, support the VCOM feature: J-Link software and hardware features overview
Via J-Link Configurator
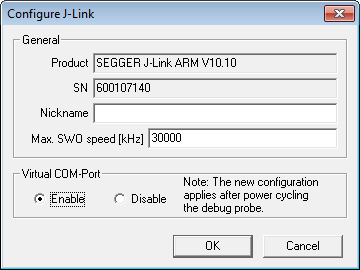
Start the J-Link Configurator and configure the device to enable VCOM functionality by double-clicking.
Under "Virtual COM-Port", choose "Enable" and click "OK". After that the device needs to be power cycled in order for VCOM to work.
Via J-Link Commander
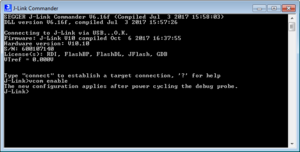
Start the J-Link Commander and enter "vcom enable". After that the device needs to be power cycled in order for VCOM to work.
Checking VCOM state
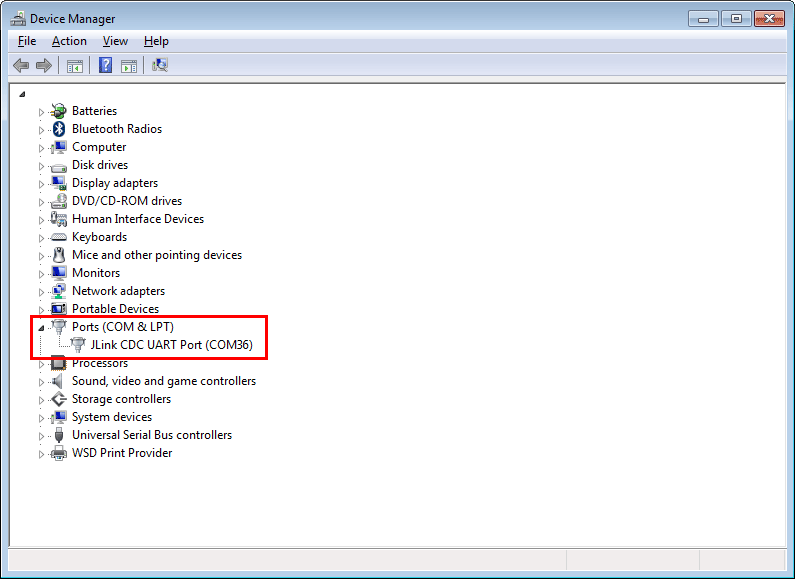
Checking if VCOM is active can be done by opening the device manager. Connected devices with VCOM functionality will be listed under "Ports (COM & LPT)".
Testing VCOM functionality and speed
The VCOM functionality can be tested for by simply connecting the Tx pin with the Rx pin - creating a loopback that way - and starting a terminal application. This leads to the Rx pin receiving the sent data meaning that VCOM is active and working.
- Create a loopback by connecting the Tx pin with the Rx pin.
- Make sure pins VTref and GND are connected to J-Link. For testing we recommend VTref = 3.3 V.
- Start a terminal application (e.g. HTerm) and establish a connection to the COM port.
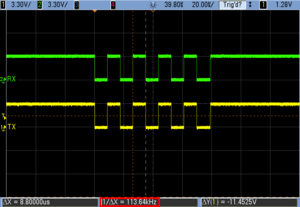
- Use an oscilloscope to visualize the signals sent via the Tx pin and the Rx pin.
- Send data via VCOM using the given terminal application. Use the letter "U" (01010101 in binary) to create a regular square-wave signal.
The oscilloscope will show the same signal sequence for both, the Rx and the Tx pin, confirming the VCOM functionality.
The speed VCOM is operating at can also be determined with an oscilloscope, e.g. by measuring the duration of a single high state.
Parity Test
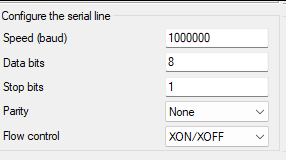
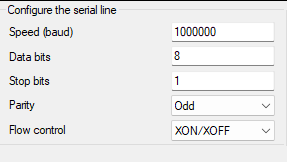
The following setup is used for the partiy function test:
- Client: PuTTY
- Baudrate: 1 MBaud (2 bits per square in screenhots)
- Transferred data: 0x55 (b'0101_0101, data sent LSB first so starts with '1')
- Count of 1-bits in data is 4 (even), so expected parity bit:
- Odd parity: Expected parity bit value: 1
- Even parity: Expected parity bit value: 0
No Parity
START (0)
Data: 1 0 1 0 1 0 1 0
STOP (1)
Odd Parity
START (0)
Data: 1 0 1 0 1 0 1 0
PARITY (1) --> Expected
STOP (1)
Even Parity
START (0)
Data: 1 0 1 0 1 0 1 0
PARITY (0) --> Expected
STOP (1)
Linux specifics
ModemManager
Many Linux distributions have the ModemManager application installed and running as a daemon by default. This daemon by default opens a connection to a CDC-ACM device (like a J-Link VCOM) as soon as the device has enumerated and starts sending AT commands over the device to the other side (usually a target MCU connected to J-Link). Depending on the target application, this may create problems because the target now receives unexpected data via VCOM. Fortunately, the ModemManager can be disabled for specific USB devices (filtered by VID and PID) via the Linux rules system (rules files).
Disabled by default for J-Link
For J-Link software installers V6.33i and later, the 99-jlink.rules file has rules that disable the ModemManager for J-Link-like USB devices.
Manually disabling ModemManager for specific USB devices
If for some reason it is necessary to disable ModemManager also for other USB devices or if the J-Link installer cannot be used on the Linux host, the rules can be specified manually. This is explained in the following:
- Download 99-segger-vcom.rules (Right-click "Save link as...")
- Edit the PID / VID in the file to match the ones you want to be affected (leaving out the PID will affect all devices of the specified VID)
- Open a terminal on the Linux host
- Execute the following commands:
- cd Downloads/SEGGER
- sudo su
- chown root 99-segger-vcom.rules
- chmod u=rw 99-segger-vcom.rules
- chmod a+r 99-segger-vcom.rules
- ls -l 99-segger-vcom.rules
- cp 99-segger-vcom.rules /etc/udev/rules.d/99-segger-vcom.rules
- udevadm control --reload-rules
- exit
Output:
alex@xxx:~$ cd Downloads/SEGGER
alex@xxx:~/Downloads/SEGGER$ sudo su
[sudo] password for alex:
root@xxx:/home/alex/Downloads/SEGGER# chown root 99-segger-vcom.rules
root@xxx:/home/alex/Downloads/SEGGER# chmod u=rw 99-segger-vcom.rules
root@xxx:/home/alex/Downloads/SEGGER# chmod a+r 99-segger-vcom.rules
root@xxx:/home/alex/Downloads/SEGGER# ls -l 99-segger-vcom.rules
-rw-r--r-- 1 root alex 133 Jul 10 15:03 99-segger-vcom.rules
root@xxx:/home/alex/Downloads/SEGGER# cp 99-segger-vcom.rules /etc/udev/rules.d/99-segger-vcom.rules
root@xxx:/home/alex/Downloads/SEGGER# udevadm control --reload-rules
root@xxx:/home/alex/Downloads/SEGGER# exit
exit
alex@xxx:~/Downloads/SEGGER$
From now on all devices with vendor ID 0x1366 (SEGGER) will not be touched by ModemManager anymore.
Finding out PID and VID
The VID and PID can be found out via the "lsusb" command:
alex@xxx:~$ lsusb
Bus 002 Device 005: ID 0bda:0411 Realtek Semiconductor Corp.
Bus 002 Device 004: ID 0bda:0411 Realtek Semiconductor Corp.
Bus 002 Device 003: ID 0bda:8153 Realtek Semiconductor Corp.
Bus 002 Device 002: ID 2109:0813 VIA Labs, Inc.
Bus 002 Device 001: ID 1d6b:0003 Linux Foundation 3.0 root hub
Bus 001 Device 003: ID 04f3:24a0 Elan Microelectronics Corp.
Bus 001 Device 002: ID 8087:0a2b Intel Corp.
Bus 001 Device 038: ID 1366:0105 SEGGER
Bus 001 Device 009: ID 0bda:5411 Realtek Semiconductor Corp.
Bus 001 Device 008: ID 0bda:5411 Realtek Semiconductor Corp.
Bus 001 Device 004: ID 0c45:6713 Microdia
Bus 001 Device 007: ID 045e:0039 Microsoft Corp. IntelliMouse Optical
Bus 001 Device 006: ID 046a:0011 Cherry GmbH G83 (RS 6000) Keyboard
Bus 001 Device 005: ID 2109:2813 VIA Labs, Inc.
Bus 001 Device 001: ID 1d6b:0002 Linux Foundation 2.0 root hub
alex@xxx:~$
The format is <VID>:<PID>
