Windows CDC Driver Installation
Windows CDC Driver Installation for Windows < 10
Since Windows 2000, Microsoft provided a driver USB CDC-ACM device, the driver is called usbser.sys. This driver was until Windows 8.1 basically the same, only versioning for the dedicated Windows version and some minor changes due some Window DDK changes have been applied. But for all versions of the driver it was necessary that a special .inf file is provided by the device supplier. For the VendorID and ProductID that is used in the CDC samples, you can used the provided CDC driver package, this is located in the USB package under: Windows\USB\CDC\. An installer is available:
- So before connecting the device to the PC, simply start the driver installer
InstallDriver.exein the said folder. After the executable is executed Windows may show the UAC message that a specific install program is started. Confirm with Yes to start installation: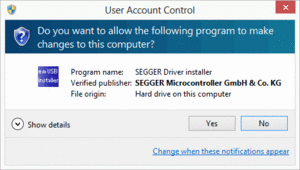
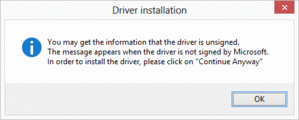
- The driver installer will notify that Windows will show up a warning message that the driver is not signed by Microsoft. The is normal warning for driver that have been signed with a valid code signing certificate. Confirm read of the message by clicking on the OK button.
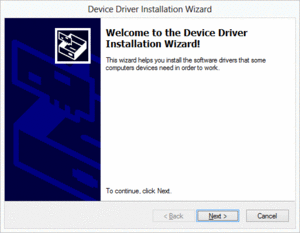
- The Device Driver Installation Wizard dialog shows up. Click on Next to continue with the driver installation.
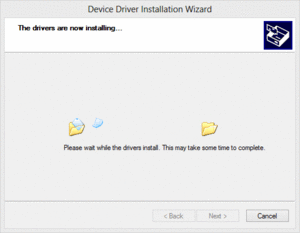
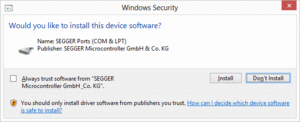
- During the driver installation you may be ask whether the device software should be installed. Since the package is signed with a valid code signing certificate, simply answer the question with “Install”.
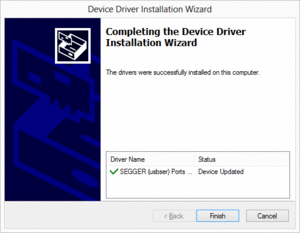
- Once the driver is installed the driver wizard will confirm that the driver is successfully installed.
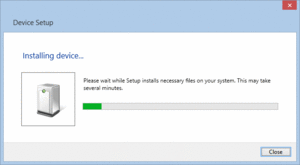
- Now the target device can be connected with the PC. Windows will detect the new hardware.
Modifying the inf file:
This inf file for CDC device has a special format as it includes some Windows supplied inf files. This is necessary in order to reduce the inf file writing process. Further information about this can be found here:Windows CDC usbser instructions
To facilitate this work, please use the provided usbser.inf in the Windows\USB\CDC folder:
;
; Device installation file for
; USB 2 COM port emulation
; Copyright (c) 2006-2014 by SEGGER Microcontroller GmbH & Co. KG
;
; This file supports:
;     Windows 2000
;     Windows XP
;     Windows Server 2003 x86, x64
;     Windows Vista x86, x64
;     Windows 7 x86,x64
;     Windows Server 2008 x86,x64
;     Windows 8 x86,x64
;     Windows 8.1 x86,x64
;
[Version]
Signature="$Windows NT$"
Class=Ports
ClassGuid={4D36E978-E325-11CE-BFC1-08002BE10318}
Provider=%MFGNAME%
DriverVer=03/12/2015,6.0.2600.5
CatalogFile=usbser.cat

[Manufacturer]
%MFGNAME%=CDCDevice,NT,NTamd64

[DestinationDirs]
DefaultDestDir = 12

[CDCDevice.NT]
%DESCRIPTION%=DriverInstall,USB\VID_8765&PID_0234

[CDCDevice.NTamd64]
%DESCRIPTION%=DriverInstall,USB\VID_8765&PID_0234

[DriverInstall]
Include=mdmcpq.inf
CopyFiles=FakeModemCopyFileSection
AddReg=DriverInstall.AddReg

[DriverInstall.AddReg]
HKR,,DevLoader,,*ntkern
HKR,,NTMPDriver,,usbser.sys
HKR,,EnumPropPages32,,"MsPorts.dll,SerialPortPropPageProvider"

[DriverInstall.Services]
AddService=usbser, 0x00000002, DriverServiceInst

[DriverServiceInst]
DisplayName=%SERVICE%
ServiceType=1
StartType=3
ErrorControl=1
ServiceBinary=%12%\usbser.sys

[SourceDisksNames.amd64]
1=%DiskName%,,

[SourceDisksFiles.amd64]

[SourceDisksNames.x86]
1=%DiskName%,,

[SourceDisksFiles.x86]

[FakeModemCopyFileSection]

[Strings]
MFGNAME = "SEGGER"
DESCRIPTION = "USB CDC serial port emulation"
SERVICE = "USB CDC serial port emulation"
DiskName="SEGGER USB CDC Installation Disk"
You have to personalize the .inf file on the first two highlighted lines. These describe the device with its product and vendor Id and the optional interface number.
USB\VID_vvvv&PID_pppp[&MI_ii], where
vvvvis the vendor idppppis the product idiiis the optional interface number.
Replace the vvvv pppp ii with your personal Vendor ID (VID) and Product ID (PID) and interface number. These are the value that have been passed by the function USBD_SetDeviceInfo().
[Strings] section are optional and not necessary for the correct function of the device. Signing the package
Newer Windows versions from Windows Vista on, will only install a driver when the driver package is signed. This signment must be done with a valid code signing certificate. For testing purpose the package also be signed in a testing environment, please refer to: https://msdn.microsoft.com/en-us/windows/hardware/drivers/install/test-signing-driver-packages/