Difference between revisions of "Using J-Link via WiFi"
(Created page with "This article explains different methods that can be used to connect to a J-Link and debug via WiFi. __TOC__ == J-Link WiFi == The J-Link WiFi comes with native WiFi support....") |
|||
| Line 6: | Line 6: | ||
The J-Link WiFi comes with native WiFi support. |
The J-Link WiFi comes with native WiFi support. |
||
For detailed information on how to setup the J-Link WiFi, please refer to [[UM08001_J-Link_/_J-Trace_User_Guide#J-Link_WiFi_setup | this article]]. |
For detailed information on how to setup the J-Link WiFi, please refer to [[UM08001_J-Link_/_J-Trace_User_Guide#J-Link_WiFi_setup | this article]]. |
||
| + | [[File:J-Link-WiFi-Over-WiFi.png | Explanatory picture will follow shortly]] |
||
== J-Link PRO and J-Trace PRO (Cortex-M) == |
== J-Link PRO and J-Trace PRO (Cortex-M) == |
||
| Line 13: | Line 14: | ||
# Power the J-Link PRO / J-Trace via a 5V USB power supply (e.g. a mobile powerbank). |
# Power the J-Link PRO / J-Trace via a 5V USB power supply (e.g. a mobile powerbank). |
||
# Connect the WiFi bridge to the Ethernet connector of the J-Link PRO |
# Connect the WiFi bridge to the Ethernet connector of the J-Link PRO |
||
| − | [[File:J-Link-PRO-WiFi-Bridge.png]] |
+ | [[File:J-Link-PRO-WiFi-Bridge.png | Explanatory picture will follow shortly]] |
== J-Link BASE or higher == |
== J-Link BASE or higher == |
||
| Line 25: | Line 26: | ||
# Install the J-Link Software Pack on the remote PC that is supposed to Control the J-Link |
# Install the J-Link Software Pack on the remote PC that is supposed to Control the J-Link |
||
# From the remote PC connect to the J-Link Remote Server on the RasPi as described in the [[J-Link_Remote_Server#Connecting_to_J-Link_using_J-Link_Remote_Server | J-Link Remote Server article]] |
# From the remote PC connect to the J-Link Remote Server on the RasPi as described in the [[J-Link_Remote_Server#Connecting_to_J-Link_using_J-Link_Remote_Server | J-Link Remote Server article]] |
||
| − | {Note|This method works for all |
+ | {{Note|This method works for all latest J-Link models.}} |
| − | [[File:J-Link-BASE-RasPi-Remoteserver.png]] |
+ | [[File:J-Link-BASE-RasPi-Remoteserver.png | Explanatory picture will follow shortly]] |
Revision as of 10:27, 28 October 2021
This article explains different methods that can be used to connect to a J-Link and debug via WiFi.
J-Link WiFi
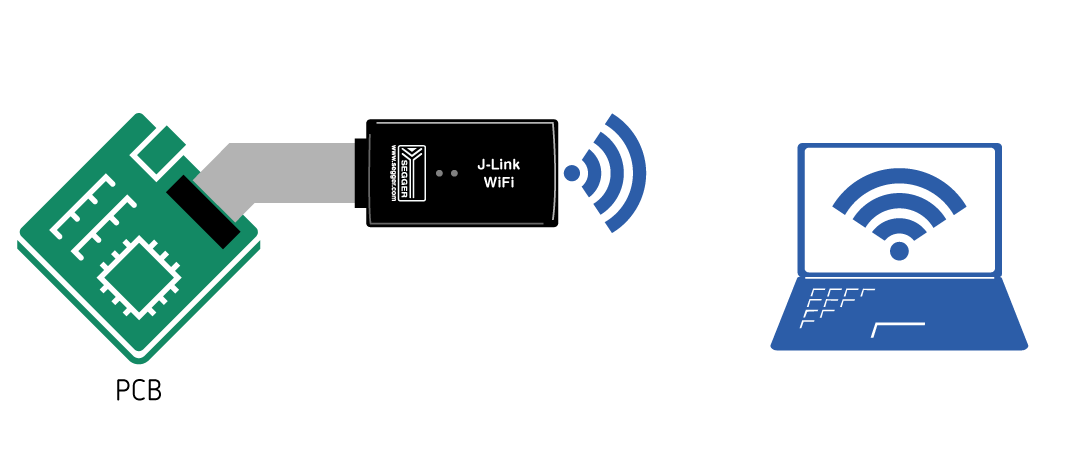
The J-Link WiFi comes with native WiFi support.
For detailed information on how to setup the J-Link WiFi, please refer to this article.

J-Link PRO and J-Trace PRO (Cortex-M)
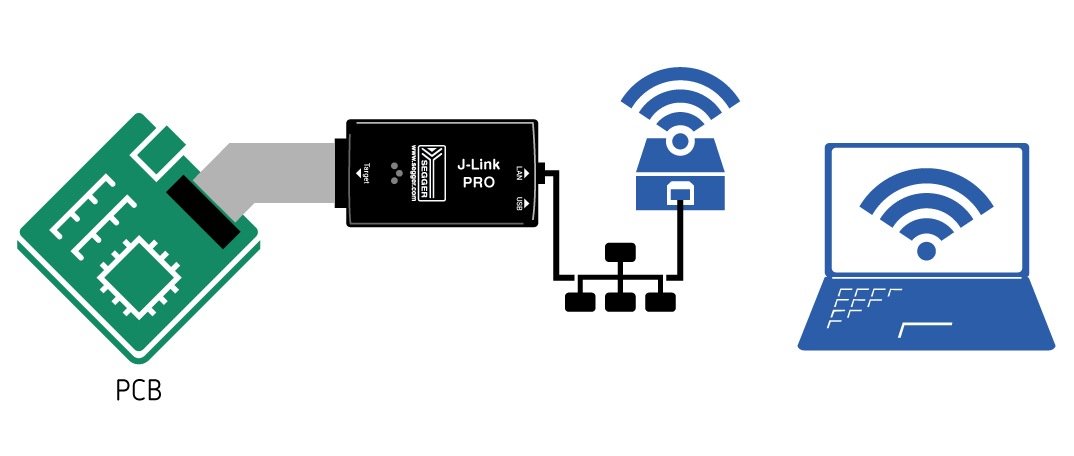
The J-Link PRO and J-Trace PRO models have an Ethernet connector for wired Ethernet. Therefore, making these models accessible via WiFi can be achieved bz simply using a WiFi bridge.
- Setup a WiFi bridge for the desired WiFi network.
- Power the J-Link PRO / J-Trace via a 5V USB power supply (e.g. a mobile powerbank).
- Connect the WiFi bridge to the Ethernet connector of the J-Link PRO
J-Link BASE or higher
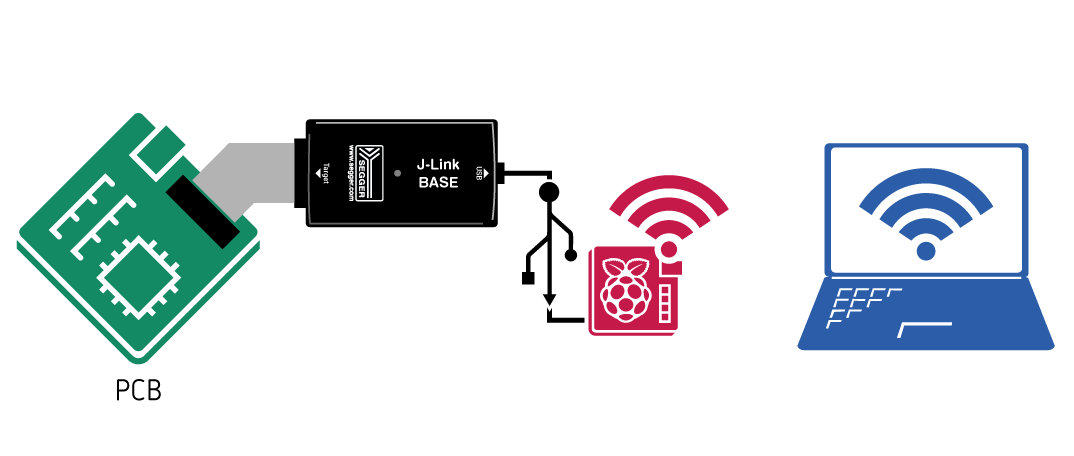
All other J-Link models do not come with native Ethernet support. However, it is still possible to make them accessible via WiFi. The easiest and most commonly used method to do so is by using a Raspberry Pi (RasPi), running the J-Link Remote Server.
- Start the RasPi and connect it to the desired WiFi network
- Install the J-Link Software Pack on the RasPi and the remote PC (available on the homepage)
- Connect the J-Link to the RasPi via USB
- Start the J-Link Remote Server on the RasPi and use it to connect to the J-Link
- Install the J-Link Software Pack on the remote PC that is supposed to Control the J-Link
- From the remote PC connect to the J-Link Remote Server on the RasPi as described in the J-Link Remote Server article
Note:
This method works for all latest J-Link models.
This method works for all latest J-Link models.

