WSL
Windows Subsystem for Linux (WSL) is a part of Windows 10, that allows the user to run Linux applications on Windows.
Contents
J-Link specifics
As of now WSL does not fully support USB devices.
In order to connect to a J-Link from WSL you either have to use the Ethernet / WiFi interface (if present, see Model overview) or make use of the J-Link Remote Server that runs on an another machine, capable of USB.
For more details please refer to the following article: Connecting to J-Link using J-Link Remote Server
Example setup with USB
J-Link Commander
In this example we will connect to our J-Link (connected via USB to the host) from WSL using the J-Link Remote Server on the host side and the J-Link Commander on the WSL side.
Requirements
- Windows 10 system which has the J-Link Software and Documentation Pack installed
- WSL system which has the J-Link Software and Documentation Pack installed
- J-Link connected via USB to the host Windows 10 system
Steps
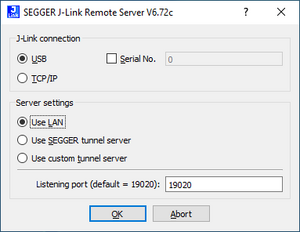
- Start the J-Link Remote Server in LAN mode on the Windows 10 host system and select the correct J-Link if prompted.
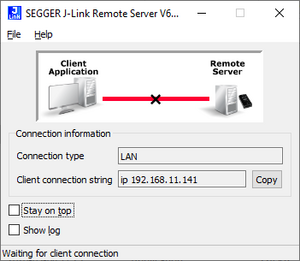
- The J-Link Remote Server will now wait for incoming connections:
- Switch to the command-line prompt of your WSL Linux system.
- Insert your target device and interface into the following command and execute it: JLinkExe -device <your-device> -ip localhost -if <target-interface> -speed 4000 -autoconnect 1
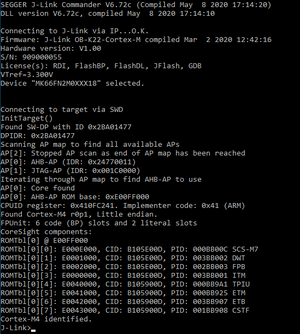
- In this example we will connect to the NXP Kinetis K66 device on our emPower board, so the command would be as follows: JLinkExe -device MK66FN2M0XXX18 -ip localhost -if SWD -speed 4000 -autoconnect 1
- Now you should be able to make use of the commands of the J-Link Commander.


