Difference between revisions of "Arduino Due"
(Created page with " This article describes how a J-Link probe can be used together with an Arduino Due board. == Minimum requirements == * Any [https://www.segger.com/products/debug-probes/j-li...") |
|||
| Line 9: | Line 9: | ||
== Preparing for J-Link == |
== Preparing for J-Link == |
||
| − | As the Arduino Due board comes with a presoldered 10-pin debug connector |
+ | As the Arduino Due board comes with a presoldered 10-pin debug connector labeled JTAG all you need is a connector/adapter for that interface. |
If you are using the full size or compact models of J-Link the [https://www.segger.com/products/debug-probes/j-link/accessories/adapters/9-pin-cortex-m-adapter/ 9-Pin Cortex-M Adapter] can be used. In this example we are using a [https://www.segger.com/products/debug-probes/j-link/models/j-link-plus/ J-Link Plus Compact]. |
If you are using the full size or compact models of J-Link the [https://www.segger.com/products/debug-probes/j-link/accessories/adapters/9-pin-cortex-m-adapter/ 9-Pin Cortex-M Adapter] can be used. In this example we are using a [https://www.segger.com/products/debug-probes/j-link/models/j-link-plus/ J-Link Plus Compact]. |
||
The resulting connection will then look like this: |
The resulting connection will then look like this: |
||
Revision as of 16:19, 30 September 2020
This article describes how a J-Link probe can be used together with an Arduino Due board.
Contents
Minimum requirements
- Any J-Link
- J-Link software V6.86a or later
- Embedded Studio Version 5.10b or later
- A way to connect to the 10 pin debug connector of the Arduino Due board
Preparing for J-Link
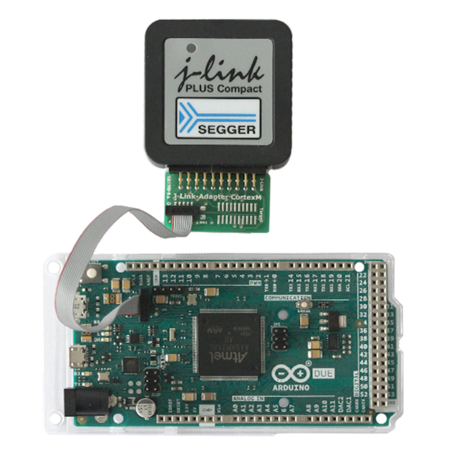
As the Arduino Due board comes with a presoldered 10-pin debug connector labeled JTAG all you need is a connector/adapter for that interface. If you are using the full size or compact models of J-Link the 9-Pin Cortex-M Adapter can be used. In this example we are using a J-Link Plus Compact. The resulting connection will then look like this:
- Power the board via one of the USB-Mini ports
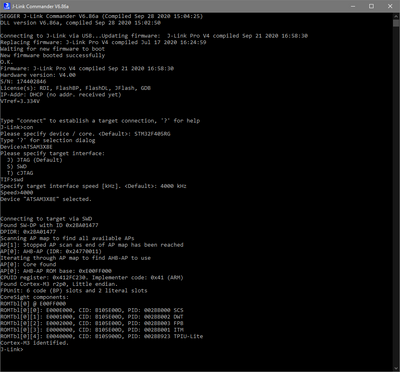
- Verify the Connection with e.g. J-Link Commander. The output should look as follows:
Debugging in SEGGER Embedded Studio
Example projects for SEGGER Embedded Studio
The following example project was created with the SEGGER Embedded Studio project wizard and runs out-of-the-box on the Arduino Due board. It is a simple Hello World sample and can be downloaded here:

