Embedded Studio VCS configuration
Version Control System (VCS) is an essential tool for individuals or development teams. SEGGER Embedded Studio integrates with several popular source-control systems to provide this feature for files in your Embedded Studio projects.
The source-control capability is implemented by a number of third-party providers, but the set of functions provided by Embedded Studio aims to be provider independent. This article will explain how to set up such a system and how to use it.
Set up source control system
Embedded Studio supports Subversion, Git, and Mercurial as source-control systems. To enable Embedded Studio to utilize source-control features, you need to install the appropriate command line client on your operating system for the source-control systems that you will use.
Once you have installed the command line client, you must configure Embedded Studio to use it.
To configure Subversion:
- Choose Tools > Options.
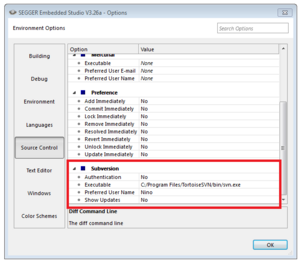
- Select the Source Control category in the options dialog.
- Set the Executable environment option of the Subversion Options group to point to Subversion svn command. On Windows operating systems, the Subversion command is svn.exe.
To configure Git:
- Choose Tools > Options.
- Select the Source Control category in the options dialog.
- Set the Executable environment option of the Git Options group to point to Git git command. On Windows operating systems, the Git command is git.exe.
To configure Mercurial:
- Choose Tools > Options.
- Select the Source Control category in the options dialog.
- Set the Executable environment option of the Mercurial Options group to point to Mercurial hg command. On Windows operating systems, the Git command is hg.exe.
Use source control in ES
To use the set up source control in ES you can either go to Project > VCS and choose one of the many source control options available or to use it on a single file basis right-click the file and from the shortcut menu choose Source Control
Set up external diff tool
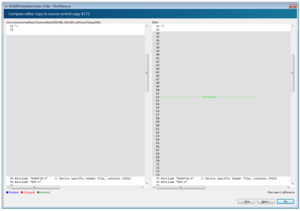
To show the differences between the file in the project and the version checked into source control you can use the build in diff tool:
- In the Project Explorer, right-click the file.
- From the shortcut menu, choose Source Control > Compare.
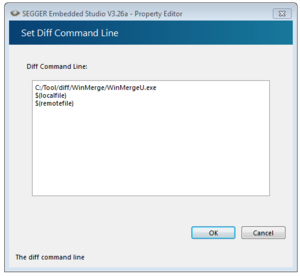
You can also use an external diff tool in preference to the built-in Embedded Studio diff tool. To define the diff command line Embedded Studio generates, choose Tools > Options > Source Control > Diff Command Line. The command line is defined as a list of strings to avoid problems with spaces in arguments. The diff command line can contain the following macros:
- $(localfile): The filename of the file in the project.
- $(remotefile): The filename of the latest version of the file in source control.
- $(localname): A display name for $(localfile).
- $(remotename): A display name for $(remotefile).


