Difference between revisions of "Flasher Hub - Project setup"
(Created page with "In order to set up the Flasher Hub for parallel programming, the connected Flasher Compact modules need to be configured once using either J-Flash or U-Flash. Both programs ar...") |
|||
| Line 49: | Line 49: | ||
[[File:UM08039_Files.png]] |
[[File:UM08039_Files.png]] |
||
| − | A third option is to upload the configuration and data files to the Flasher Compact modules via FTP as described here: [[ |
+ | A third option is to upload the configuration and data files to the Flasher Compact modules via FTP as described here: [[Flasher Hub - FTP server]]. |
If J-Flash also generates a .pex file (which is a device-specific flash programming algorithm that is required for certain target devices), this also needs to be uploaded to the module folder(s) for programming to be successful. |
If J-Flash also generates a .pex file (which is a device-specific flash programming algorithm that is required for certain target devices), this also needs to be uploaded to the module folder(s) for programming to be successful. |
||
Latest revision as of 16:03, 6 May 2024
In order to set up the Flasher Hub for parallel programming, the connected Flasher Compact modules need to be configured once using either J-Flash or U-Flash. Both programs are part of SEGGER's Flasher software and documentation package, available for download free of cost at:
https://www.segger.com/downloads/flasher/#FlasherSoftwareAndDocumentationPack.
Contents
Using J-Flash
J-Flash is SEGGER's desktop software for production programming and it is available for Windows, macOS and Linux. It can be used to create Flasher configuration and data files for ARM-based target devices. For more information about J-Flash, please refer to the J-Flash User Manual.
In order to set up the Flasher Hub for parallel programming, the connected Flasher Compact modules need to be configured once using J-Flash.
After starting J-Flash, open the appropriate J-Flash project for the target device the Flasher Compacts shall be configured for, by selecting File -> Open Project. If J-Flash does not come with an appropriate sample project for the desired hardware, a new project needs to be created by selecting File -> New Project.
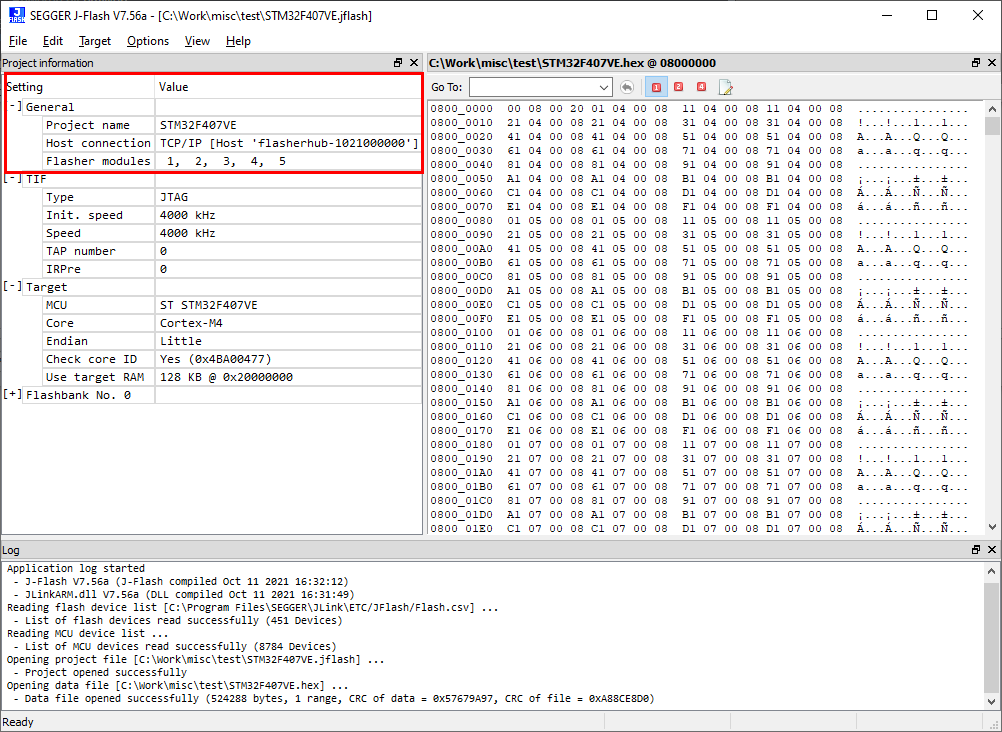
After the appropriate project has been opened / created, the data file which shall be programmed needs to be loaded, by selecting File -> Open data file.... Next, click on Options -> Project settings -> General and select Connection type to be TCP/IP. As the TCP/IP address, enter flasherhub-<serial_number>. You can find the serial number of your Flasher Hub on the product housing.
Click Flasher Hub module selection and select the Flasher Compact module numbers you would like to configure. Then click OK.
After this, J-Flash should look similar to the screenshot below.
Next, you can transfer the necessary files to the Flasher Compacts using File -> Download config & data file to Flasher. Check the J-Flash Log window to make sure the file transfer was successful. For further details please check the J-Flash manual.
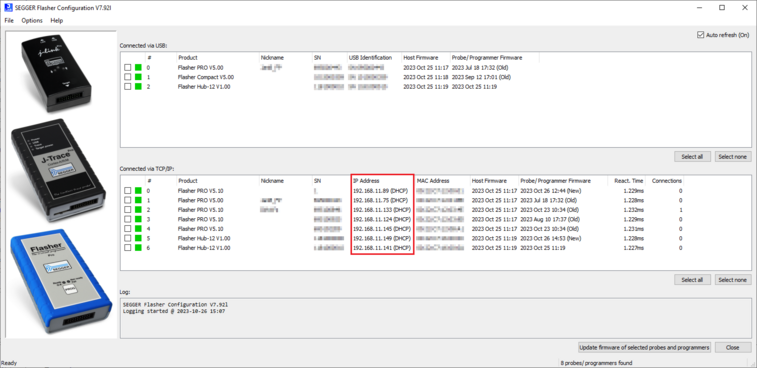
If J-Flash has trouble connecting to flasherhub-<serial_number>, use the actual IP address of your Flasher Hub. You can find the Flasher Hub's IP address by using the Flasher Configurator:
From now on, the Flasher Hub and the attached Flasher Compacts can be used in stand-alone mode (without host PC interaction) for stand-alone programming.
As an alternative to the process described above, you may also save the files to disk and upload them to the Flasher Compacts via the web interface. To do this, follow the instructions below:
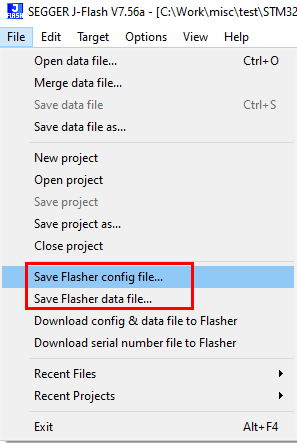
- Save the configuration (project) file to disk by selecting File -> Save Flasher Config File
- Save the data (program data) file by selecting File -> Save Flasher Data File
- Connect to the Flasher Hub Web interface via a browser.
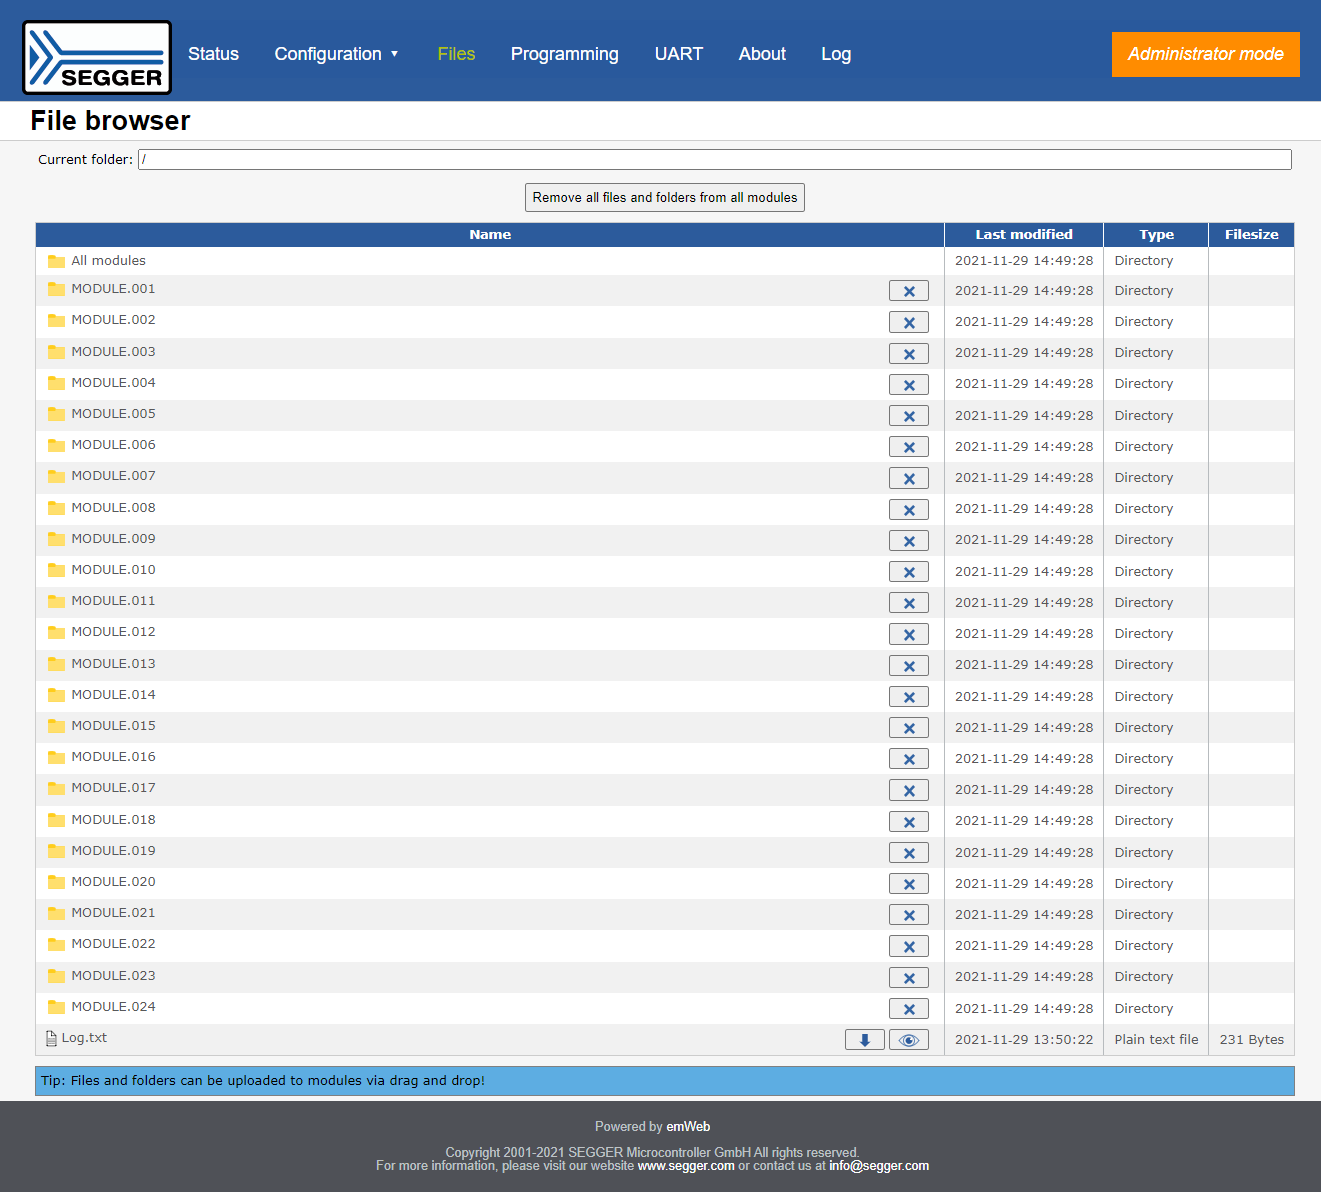
- Navigate to the file browser in the "Files" tab
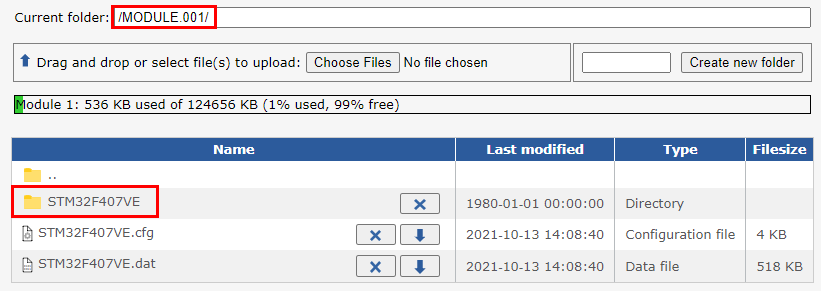
- Now the configuration file and the data file can be uploaded to the Flasher Hub module folder(s) (MODULE.xxx), i.e. to the connected Flasher Compacts.
Choosing the All modules folder will upload the files to all Flasher Compacts connected to the Flasher Hub.
Note: The file(s) can be uploaded by dragging and dropping inside the browser window.
A third option is to upload the configuration and data files to the Flasher Compact modules via FTP as described here: Flasher Hub - FTP server.
If J-Flash also generates a .pex file (which is a device-specific flash programming algorithm that is required for certain target devices), this also needs to be uploaded to the module folder(s) for programming to be successful. Please note that it must be located in a subfolder with the same name as your project, e.g. if your project is named MyProject with the project files MyProject.cfg and MyProject.dat, then the subfolder must be named MyProject.
Using U-Flash
The Universal Flash Loader mode can be used to program non ARM-based targets. While configurations generated with J-Flash rely on using the debug interface of the device, configurations using U-Flash make use of device or vendor specific programming interfaces and protocols and therefore it is independent of the CPU core.
A Universal Flash Loader configuration can be created using SEGGER's U-Flash, available for Windows, macOS and Linux.
For details, please see the U-Flash User Manual (UM08037) as well as the Flasher User Manual (UM08022).
