Difference between revisions of "IAR EWARM"
(Created page with "IAR EWARM is a Visual Studio style, commercial toolchain including a non-GCC compiler. We recommend to always install the latest J-Link software and documentation pack to mak...") |
(→Using the J-Link Flash loader) |
||
| Line 35: | Line 35: | ||
# Open the project settings ('''ALT + F7''') |
# Open the project settings ('''ALT + F7''') |
||
| − | # Make sure appropriate target device is specified ([[IAR_EWARM# |
+ | # Make sure appropriate target device is specified ([[IAR_EWARM#Using_J-Link_with_an_existing_project|Specifying the target device]]) |
# Select '''Debugger''' in the list on the left site |
# Select '''Debugger''' in the list on the left site |
||
# Select the tab '''Download''' |
# Select the tab '''Download''' |
||
Revision as of 16:20, 19 September 2017
IAR EWARM is a Visual Studio style, commercial toolchain including a non-GCC compiler. We recommend to always install the latest J-Link software and documentation pack to make sure that EWARM uses the latest J-Link DLL.
Contents
Using J-Link with an existing project
In the following, it is explained how to configure a project to be used with J-Link.
Specifying the target device
- Open the project to configure
- Open the project settings (ALT + F7)
- Go to General Options --> Target
- Make sure that the proper device is selected
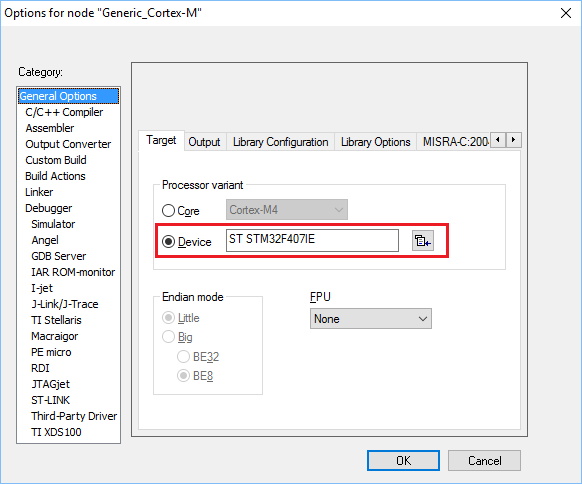

If the target device used is not listed in EWARM, either a IAR device description file (.ddf) or the IDE independent way can be used. For further information regarding .ddf files, please refer to the IAR documentation.
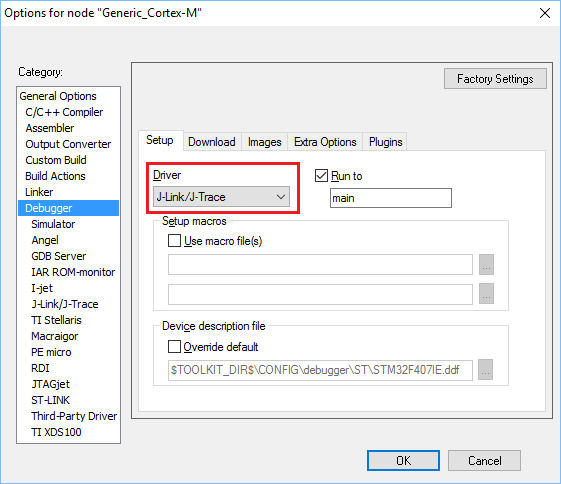
- Go to Debugger --> Setup and select J-Link/J-Trace in the Driver drop-down menu

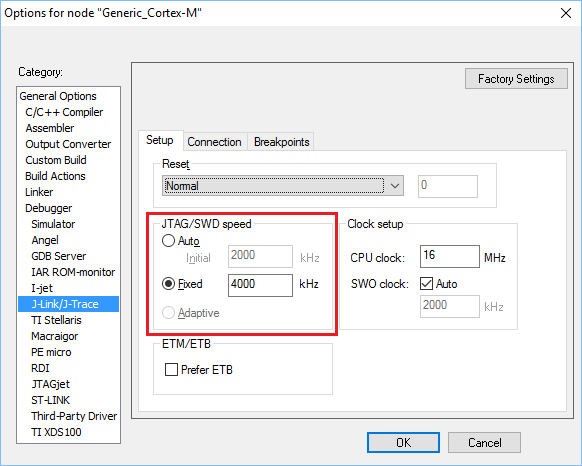
- Go to J-Link/J-Trace --> Setup
- Configure a proper target interface speed (fixed 4000 kHz is suitable for most targets and leads to good performance)

- Switch to the Connection tab
- Select the appropriate target interface in the Interface box

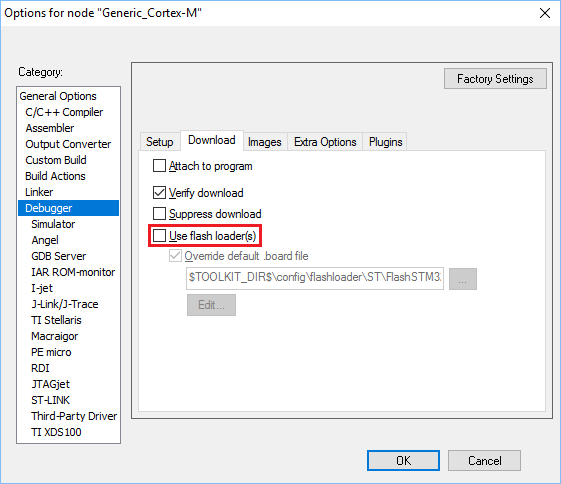
Using the J-Link Flash loader
- Open the project settings (ALT + F7)
- Make sure appropriate target device is specified (Specifying the target device)
- Select Debugger in the list on the left site
- Select the tab Download
- Uncheck Use flash loader(s)

Using J-Link script files
IAR EWARM does not provide any native support for J-Link script files so usage of them cannot be configured from within the GUI of the IDE itself.
Anyhow, it is possible to use a J-Link script file by making use of the auto-search feature of the DLL:
- Copy the J-Link script file to folder where the J-Link settings file is located (see section "J-Link settings file" below)
- Rename the J-Link script to <ProjectName>_<DebugConfig>.JLinkScript. In the sample below, Start_STM32F103_MB672_Debug.JLinkScript would be correct.
J-Link settings file
Settings file with default settings is created on first start of a debug session.
There is one settings file per build configuration for the project.
Naming is:
<ProjectName>_<DebugConfig>.jlink
The settings file is created in a "settings" subdirectory where the project file is located.

RDI
NOTE: Since IAR EWARM V5.30 J-Link is fully and natively supported by EWARM, so RDI is no longer needed.
In order to use J-Link RDI, the debug driver needs to be changed.
- Open the project settings (ALT + F7)
- Select Debugger in the list on the left site
- Select "RDI" in the Driver drop-down menu
- Select RDI in the list on the left site
- Select the tab RDI
- Select the manufacturer driver by navigating to the J-Link software installation directory, and select JLinkRDI.dll, then click OK
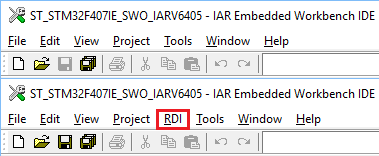
- Now an extra menu, RDI, has been added to the menu bar.
- Choose Configure in the RDI menu to configure J-Link RDI. For more information about the setup of J-Link RDI, please refer to UM08001.

Debugging on Cortex-M devices
The RDI protocol has only been specified by ARM for ARM 7/9 cores. For Cortex-M there is no official extension of the RDI protocol regarding the register assignement, that has been approved by ARM. Since IAR EWARM version 5.11 it is possible to use J-Link RDI for Cortex-M devices because SEGGER and IAR have come to an agreement regarding the RDI register assignment for Cortex-M. The following table lists the register assignment for RDI and Cortex-M:
| Register Index | Assigned register |
|---|---|
| 0 | R0 |
| 1 | R1 |
| 2 | R2 |
| 3 | R3 |
| 4 | R4 |
| 5 | R5 |
| 6 | R6 |
| 7 | R7 |
| 8 | R8 |
| 9 | R9 |
| 10 | R10 |
| 11 | R11 |
| 12 | R12 |
| 13 | MSP / PSP (depending on mode) |
| 14 | R14 (LR) |
| 16 | R15 (PC) |
| 17 | XPSR |
| 18 | APSR |
| 19 | IPSR |
| 20 | EPSR |
| 21 | IAPSR |
| 22 | EAPSR |
| 23 | IEPSR |
| 24 | PRIMASK |
| 25 | FAULTMASK |
| 26 | BASEPRI |
| 27 | BASEPRI_MAX |
| 28 | CFBP (CONTROL/FAULT/BASEPRI/PRIMASK) |
SWO
Enabling stdout redirection to SWO
It is possible to configure the IAR EWARM compiler so that stdout is redirected to SWO.
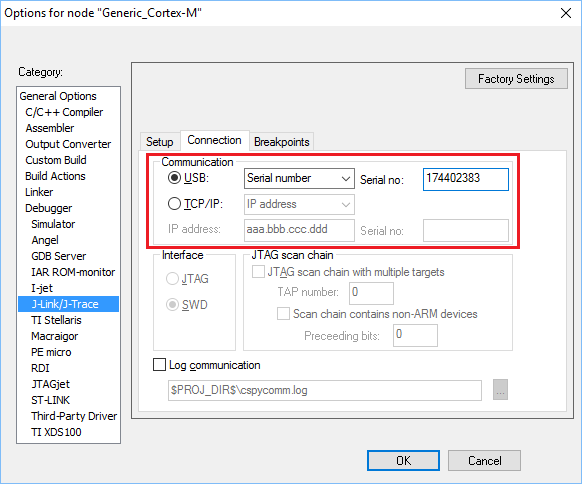
Connecting to a specific J-Link
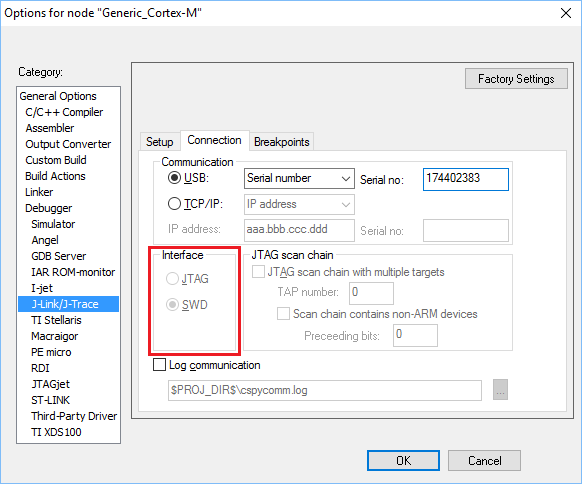
If multiple J-Links are connected to the host PC and/or a J-Link connection via TCP/IP shall be used, either the IDE independent way can be used, or the S/N or IP of the respective J-Link can be specified in the IAR EWARM project settings.
In order to explicitly specify the J-Link to use,
- Open the project settings (ALT + F7)
- Select J-Link/J-Trace in the list on the left site
- Select the tab Connection
- For USB:
- Select USB
- Select "Serial number" in the drop-down menu
- Enter the S/N in the field labeled Serial no:
- For IP:
- Select TCP/IP
- Select "IP address" in the drop-down menu
- Enter the IP address in the field labeled IP address: