Difference between revisions of "NXP LPCXpresso860-MAX"
(Created page with "450px|right This article describes specifics for the NXP LPCXpresso860-MAX evaluation board. __TOC__ <br clear=all> == Preparing for J-Lin...") |
|||
| Line 1: | Line 1: | ||
| − | [[File:NXP_LPCXpresso860-MAX.jpg|450px|right]] |
+ | [[File:NXP_LPCXpresso860-MAX.jpg|thumb|450px|right|NXP LPCXpresso860-MAX evaluation board top side view]] |
This article describes specifics for the NXP LPCXpresso860-MAX evaluation board. |
This article describes specifics for the NXP LPCXpresso860-MAX evaluation board. |
||
__TOC__ |
__TOC__ |
||
| − | <br clear=all> |
||
== Preparing for J-Link == |
== Preparing for J-Link == |
||
Revision as of 14:21, 7 September 2023

This article describes specifics for the NXP LPCXpresso860-MAX evaluation board.
Contents
Preparing for J-Link
- Connect the J-Link to J7 using the 9-Pin Cortex-M Adapter
- Power the board via micro USB (J4)
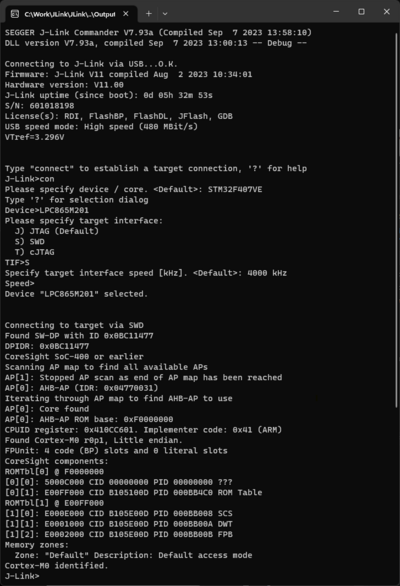
- Verify the Connection with e.g. with J-Link Commander. The output should look as follows:

Example Project
TBD