Read-Modify-Write Flash
This article describes how to use the Read-Modify-Write function of J-Link. This article assumes that there is already a basic knowledge about flash programming in general. The following example project will be shown for a Infineon XMC4500 MCU but can be applied to any other MCU which gives the option to split up physical memory sectors into smaller logical ones. By default the Read-Modify-Write threshold is set to 1 kB. To increase the threshold J-Link offers the following command string: SetFlashDLNoRMWThreshold = <value> A more detailed description is available in the J-Link users manual (UM 8001).
Minimum requirements
In order to use the example project the following minimum requirements have to be met:
- J-Link software version V6.14a or later
- J-Link Plus HW version V10.1 or later
- Windows PC to execute the .bat file in the example project
Sample project
The sample project is designed to be used with J-Link Plus and a Infineon XMC4500 MCU.
How to
To use the example project follow these steps:
- Unzip the contents of the Wiki_RMW.zip to a example folder
- execute StartTest.bat
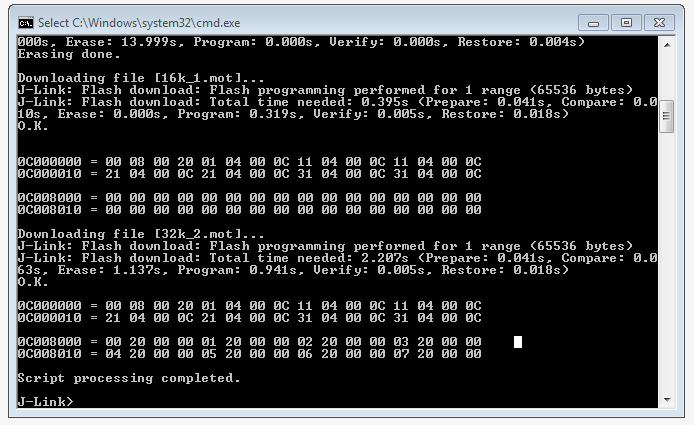
- The J-Link commander will open and you should see the following output
