Difference between revisions of "STM32CubeIDE"
| Line 6: | Line 6: | ||
=Using STM32CubeIDE with J-Link= |
=Using STM32CubeIDE with J-Link= |
||
In the following, a short step-by-step tutorial how to create a new STM32CubeIDE project to be used with J-Link, is given. |
In the following, a short step-by-step tutorial how to create a new STM32CubeIDE project to be used with J-Link, is given. |
||
| + | |||
==Adding J-Link support at installation time== |
==Adding J-Link support at installation time== |
||
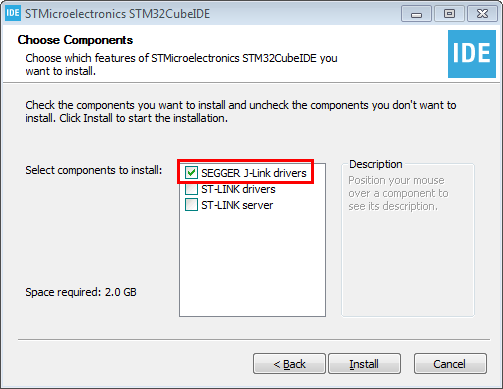
*In STM32CubeIDE, J-Link is supported out-of-the-box if J-Link support is selected to be added at installation time.<br>[[File:STM32CubeIDE_InstJLinkSupport.png]] |
*In STM32CubeIDE, J-Link is supported out-of-the-box if J-Link support is selected to be added at installation time.<br>[[File:STM32CubeIDE_InstJLinkSupport.png]] |
||
| + | |||
== Setting up a project == |
== Setting up a project == |
||
*Click on '''File''' -> '''New''' -> '''STM32 Project''' |
*Click on '''File''' -> '''New''' -> '''STM32 Project''' |
||
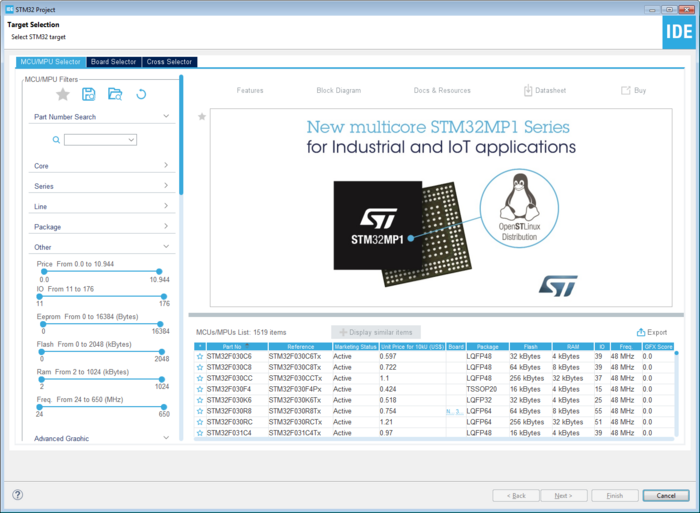
| − | *After The STM32 Target Selection has opened, select the desired device/board you want to create a project for and click on '''Next'''.<br>[[File:STM32CubeIDE_TargetSelection.png]] |
+ | *After The STM32 Target Selection has opened, select the desired device/board you want to create a project for and click on '''Next'''.<br>[[File:STM32CubeIDE_TargetSelection.png | 700px]] |
*Select your desired Project Setup and click on '''Finish'''. |
*Select your desired Project Setup and click on '''Finish'''. |
||
| + | |||
== Setting up J-Link as debug Probe== |
== Setting up J-Link as debug Probe== |
||
*Open '''Run''' -> '''Debug Configurations...''' |
*Open '''Run''' -> '''Debug Configurations...''' |
||
| Line 17: | Line 20: | ||
**Go to '''Debugger''' Tab and Select SEGGER J-LINK as debug probe. <br>[[File:STM32CubeIDE_DBGConf_Debugger.png]] |
**Go to '''Debugger''' Tab and Select SEGGER J-LINK as debug probe. <br>[[File:STM32CubeIDE_DBGConf_Debugger.png]] |
||
**Select your desired settings for the debug session and click on '''Apply'''. |
**Select your desired settings for the debug session and click on '''Apply'''. |
||
| + | |||
==Ready for debugging== |
==Ready for debugging== |
||
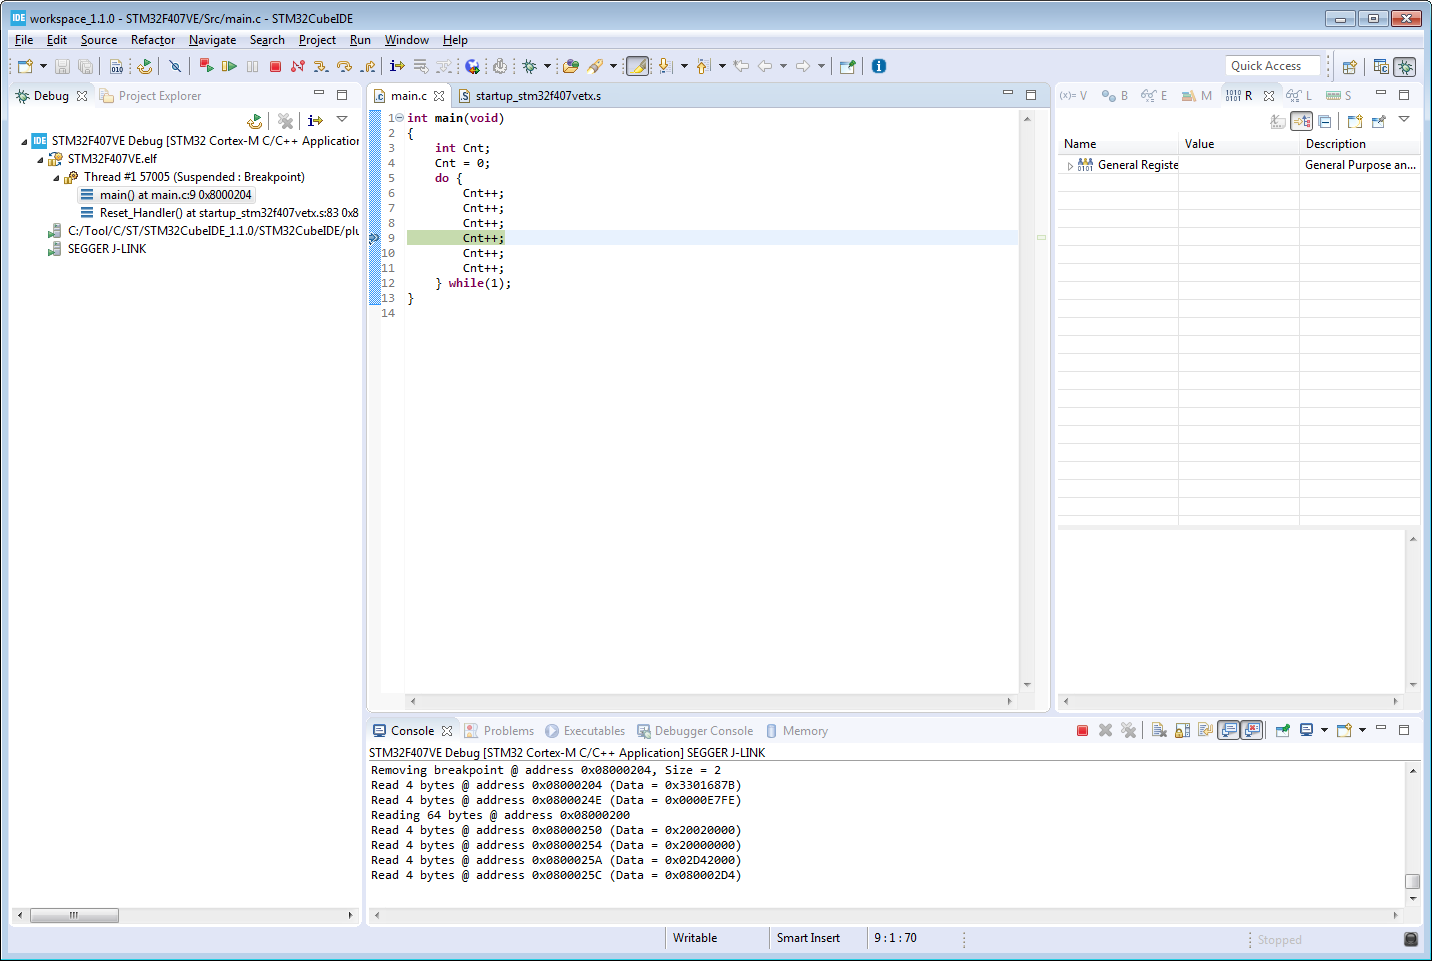
*Now the project is ready to be debugged with J-Link.<br>[[File:STM32CubeIDE_DebugSession.png]] |
*Now the project is ready to be debugged with J-Link.<br>[[File:STM32CubeIDE_DebugSession.png]] |
||
Revision as of 14:30, 11 November 2019
STM32CubeIDE is an eclipse based IDE developed by ST. This article covers the usage of the STM32CubeIDE in combination with a SEGGER J-Link.
Contents
Using STM32CubeIDE with J-Link
In the following, a short step-by-step tutorial how to create a new STM32CubeIDE project to be used with J-Link, is given.
Adding J-Link support at installation time
- In STM32CubeIDE, J-Link is supported out-of-the-box if J-Link support is selected to be added at installation time.

Setting up a project
- Click on File -> New -> STM32 Project
- After The STM32 Target Selection has opened, select the desired device/board you want to create a project for and click on Next.
- Select your desired Project Setup and click on Finish.

Setting up J-Link as debug Probe
- Open Run -> Debug Configurations...
- Right-click on STM32 Cortex-M C/C++ Application and click on New Configuration.
- Go to Debugger Tab and Select SEGGER J-LINK as debug probe.
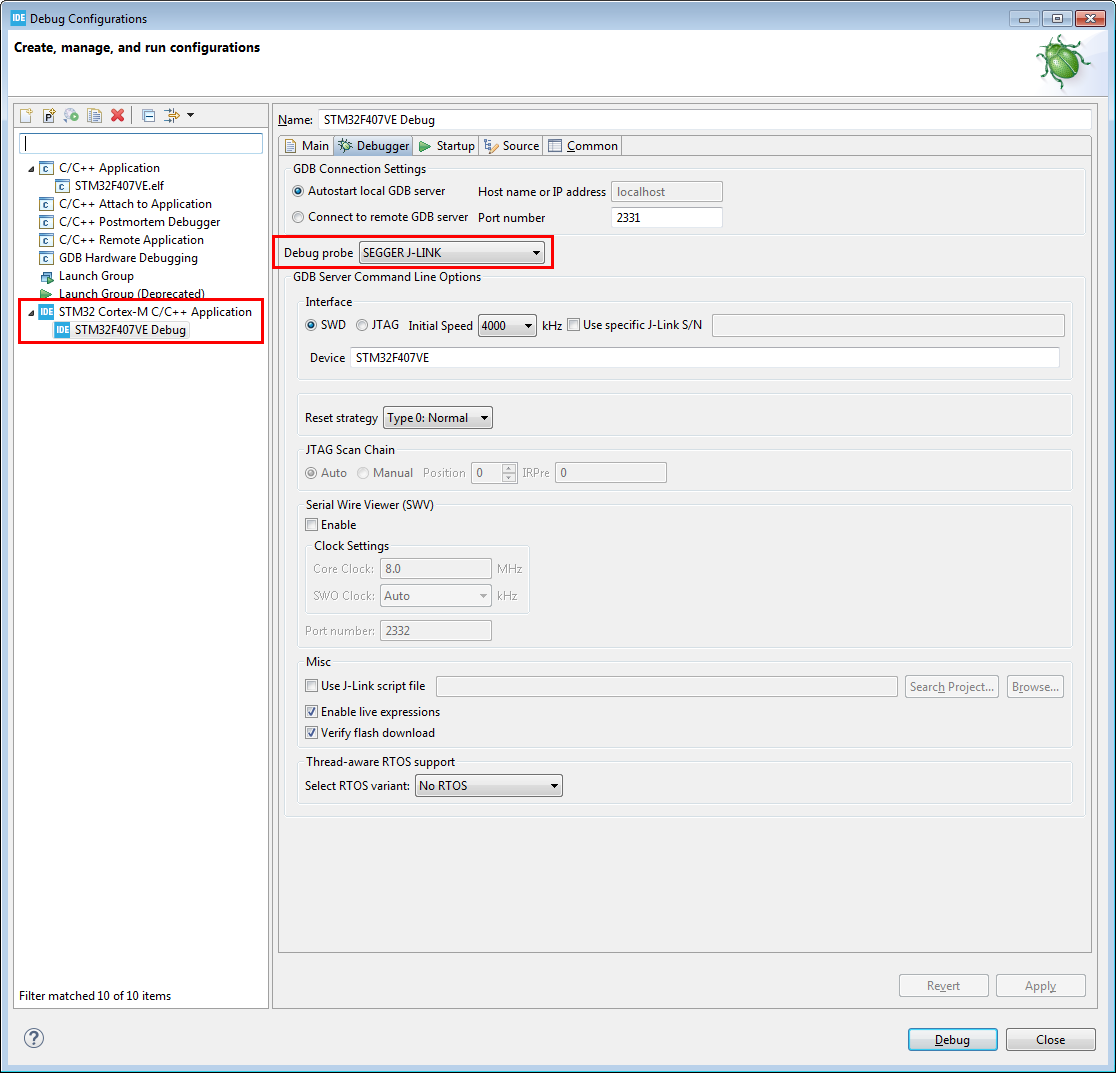
- Select your desired settings for the debug session and click on Apply.

Ready for debugging
- Now the project is ready to be debugged with J-Link.