Enable J-Link log file
Contents
Enable J-Link Log File
Software which uses the J-Link DLL to include J-Link support (e.g. IDEs), can implement an option to specify a J-Link log file. As this is no must, the J-Link log file can also be set / overwritten using the J-Link Control Panel. This allows to create a log file independent of the used software. Please note, right now the J-Link Control Panel is available in the windows software package, only.
Following steps needs to be done to configure the J-Link log file using the J-Link Control Panel:
- Open the J-Link Commander
- Click the small green J-Link icon in the windows task bar
- Switch to the Settings tab in the J-Link Control Panel
- Check the Override checkbox in the Log file section and specify a path to the log file
- Close the J-Link Commander
- From now, any J-Link DLL based application uses the J-Link log file override
The override option can be used in any application to create the J-Link log file as it is a global override.
J-Link Commander
The J-Link Commander allows to configure the J-Link log file using the "log <LogFilePath>" command.
J-Link GDB Server
The J-Link logfile can be enabled by passing the -log <Path> command via command line option to the J-Link GDB Server.
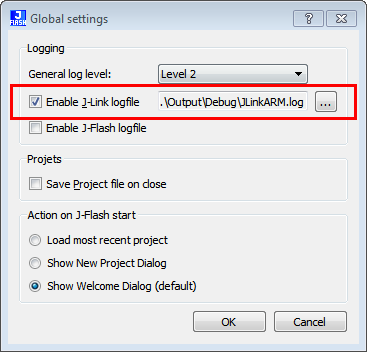
J-Flash
J-Flash --> Options --> Global settings... --> Enable J-Link logfile
Ozone
The J-Link log file can be enabled using the User Actions function int Project.SetJLinkLogFile(const char* FileName);. We recommend to add this function call in the OnProjectLoad() project function. For further information regarding this, please refer to the Ozone User Manual (UM08025).
Embedded Studio
In Embedded Studio the J-Link log file can be simply set through the project settings under: Project->Edit Options...->Debug->J-Link->Log File

IAR EWARM
Open the project options Project --> Options and switch to the J-Link / J-Trace --> Connection tab. Check the Log communication checkbox and enter a path as in the screenshot below.
