Difference between revisions of "Renesas RZ/A3UL SMARC EVK"
(Created page with "__TOC__ This article describes specifics for the Renesas RZ/A3UL SMARC evaluation board. The board supports different boot / power modes. File:Renesas_RZ/A3UL_SMARC_EVK.jp...") |
(→Preparing for J-Link) |
||
| (6 intermediate revisions by the same user not shown) | |||
| Line 3: | Line 3: | ||
This article describes specifics for the Renesas RZ/A3UL SMARC evaluation board. The board supports different boot / power modes. |
This article describes specifics for the Renesas RZ/A3UL SMARC evaluation board. The board supports different boot / power modes. |
||
| − | [[File: |
+ | [[File:Renesas_RZ_A3UL_SMARC_EVK.jpg|450px]] |
| − | |||
== Minimum requirements == |
== Minimum requirements == |
||
* J-Link software V7.70a or later |
* J-Link software V7.70a or later |
||
| − | |||
== Preparing for J-Link == |
== Preparing for J-Link == |
||
| + | *'''Make sure that SW1-1 == OFF (default is ON). This is necessary to enable debugging.''' |
||
*Connect the J-Link to the SWD header (CN2) |
*Connect the J-Link to the SWD header (CN2) |
||
*Power the board via USB-C (5V / 3A) |
*Power the board via USB-C (5V / 3A) |
||
*Press the POWER button for a few seconds until the ''Carrier PWR On'' led turns on |
*Press the POWER button for a few seconds until the ''Carrier PWR On'' led turns on |
||
*Verify the Connection with e.g. [https://wiki.segger.com/J-Link_cannot_connect_to_the_CPU#Verify_functionality_using_J-Link_Commander J-Link Commander]. The output should look as follows: |
*Verify the Connection with e.g. [https://wiki.segger.com/J-Link_cannot_connect_to_the_CPU#Verify_functionality_using_J-Link_Commander J-Link Commander]. The output should look as follows: |
||
| + | [[File:Renesas_RZ_A3UL_SMARC_Connect.PNG|400px]] |
||
| − | |||
| − | [[File:Renesas_RZ/A3UL_SMARC_Connect.PNG|400px]] |
||
== Example Project== |
== Example Project== |
||
| − | * |
+ | *N/A |
Latest revision as of 10:52, 11 August 2022
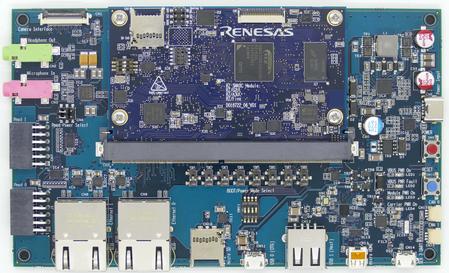
This article describes specifics for the Renesas RZ/A3UL SMARC evaluation board. The board supports different boot / power modes.
Minimum requirements
- J-Link software V7.70a or later
Preparing for J-Link
- Make sure that SW1-1 == OFF (default is ON). This is necessary to enable debugging.
- Connect the J-Link to the SWD header (CN2)
- Power the board via USB-C (5V / 3A)
- Press the POWER button for a few seconds until the Carrier PWR On led turns on
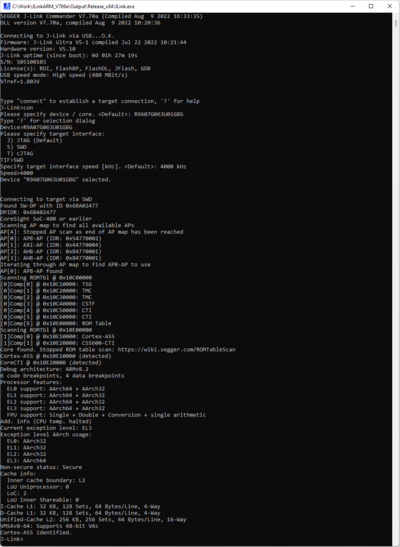
- Verify the Connection with e.g. J-Link Commander. The output should look as follows:
Example Project
- N/A

